
Getting Started:
Login to Your Account:
After creating an account, follow these steps to log in to your Roshni Online account:
- You will be automatically redirected to the sign-in page after signing up.
- Phone Number and Password: Enter your phone number and password.
- Sign In: Click the Sign In button to access the post-job section.

- Getting Your Location: After signing in, you’ll be redirected to the dashboard. The Ustad Online app will then request access to your device location. Please allow the app to access your location for better service.

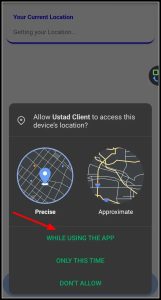
- Confirm you location: after allow location turn on your device location, App will get your location then click on confirm your location button from below.


User interface overview:
Description of components (menus):
In this section we will add the description about the menus of Roshni Online App. User will click on 3 lines from top left corner, navigation menus will open.
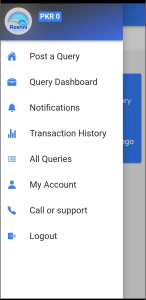
Post a Query:
Click Post a Query to go to the job posting panel. Confirm your location, then you’ll be taken to the categories panel to continue posting your Query.
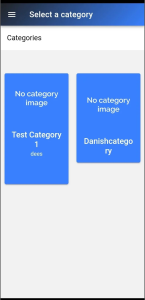
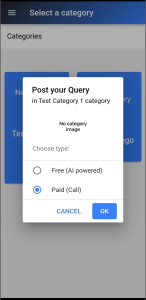
The client selects a category based on his needs. A popup will appear, and the client can click select the type and click on ok to post the query.
Query Dashboard:
The Query Dashboard menu takes the client to the Query dashboard panel, where they can view and track their active Queries and their status.
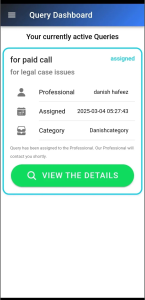
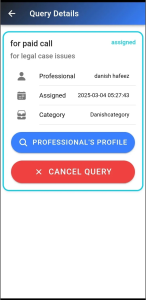
Clicking the view the details button takes the client to the query details panel. Here, they can view query details and cancel the job by clicking Cancel Job also can view the professional profile.
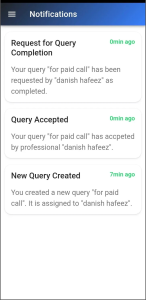
Notifications:
Click on “Notifications” to see updates about Query status, transactions, or other important alerts in your account.
Transaction History:
Click on “Transaction History” to view all payments made for hiring professionals and the balance added to your account.
![]()
All Queries:
Click on “All Queries” to view the jobs panel. Here, client can see Query categories such as New, Active, Assigned, Canceled, and Pending.
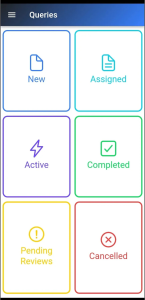
New: Click on the “New” box to go to the unassigned queries panel, where client can view a list of queries that haven’t been assigned yet.
Assigned: Click on the “Assigned” box to be redirected to the assigned queries panel, showing queries that have been assigned to professionals.
Active: The “Active” button takes client to the active queries panel, where you can check the status of ongoing/pending approval queries.
Completed: Click on the “Completed” box to view queries that have been finished by professionals.
Canceled: Click on the “Canceled” box to see a list of queries that were either canceled by you or the Roshni Online team.
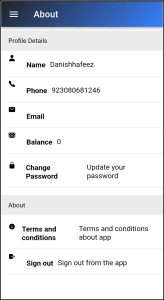
About:
Click on the “About” menu to go to the About panel. Here, client find two sections that provide details about Roshni Online
Profile Details: In this section, the client can view personal information like Name, Phone Number, Email, and Account Balance. To update the password, click on “Change Password.”
In the About section, the client can read the Terms and Conditions by clicking on the “Terms and Conditions” text.
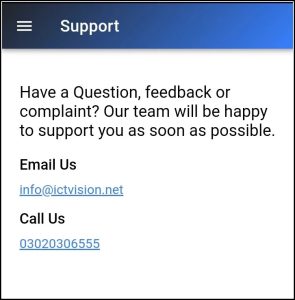
Call or Support:
Opens the support panel, where clients can contact the Roshni online team via the provided email or phone for questions, feedback, or complaints.
Log out:
Click on logout for logout from Application.